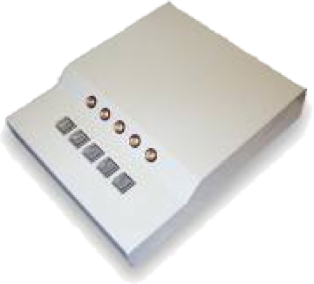
A built-in feature in SV-1 gives it the ability to emulate the PST Serial Response Box Model 200A shown on the right. This feature enables SV-1 to seamlessly work with PST’s E-Prime software. Unfortunately, on the first generation of SV-1 units, a bug crept into its firmware. This bug prevents the first generation units from working with E-Prime or from having the firmware updated.
The second generation of SV-1 units have the following symbol on the bottom label:
The first generation models do not have this symbol. If you own a first generation model and want to use it with E-Prime, contact Cedrus.

Configuring second generation SV-1 units for use with E-Prime requires the downloading of a program called Xidon (pronounced Zydon) and running it:
That’s it; your SV-1 unit is ready to use with E-Prime.
Important: once your SV-1 unit is in E-Prime mode, Xidon 1.x will no longer be able to communicate with it. But you can still use SuperLab version 4 or later to switch it out of E-Prime mode.
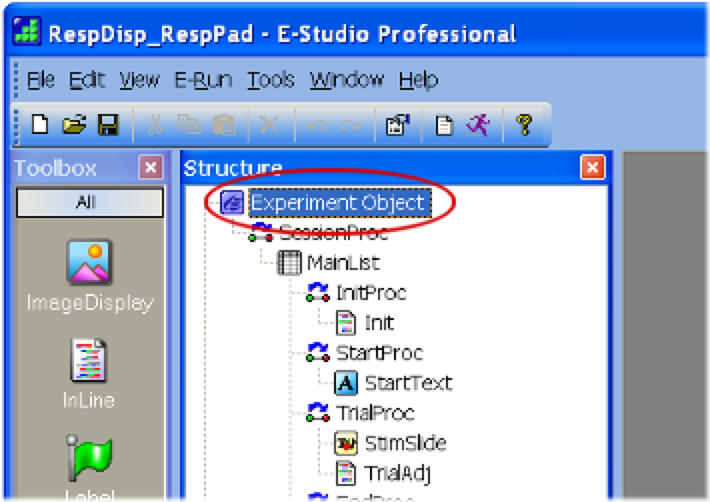
The following screen snapshots were taken using E-Prime 2.0 and might look a little different for other versions; they used this file as a demo.
1.
In E-Prime, double-click on the Experiment Object:
2.
The Experiment Object’s Properties dialog (screen) will appear. Click on the Devices tab, then click on the Add… button.
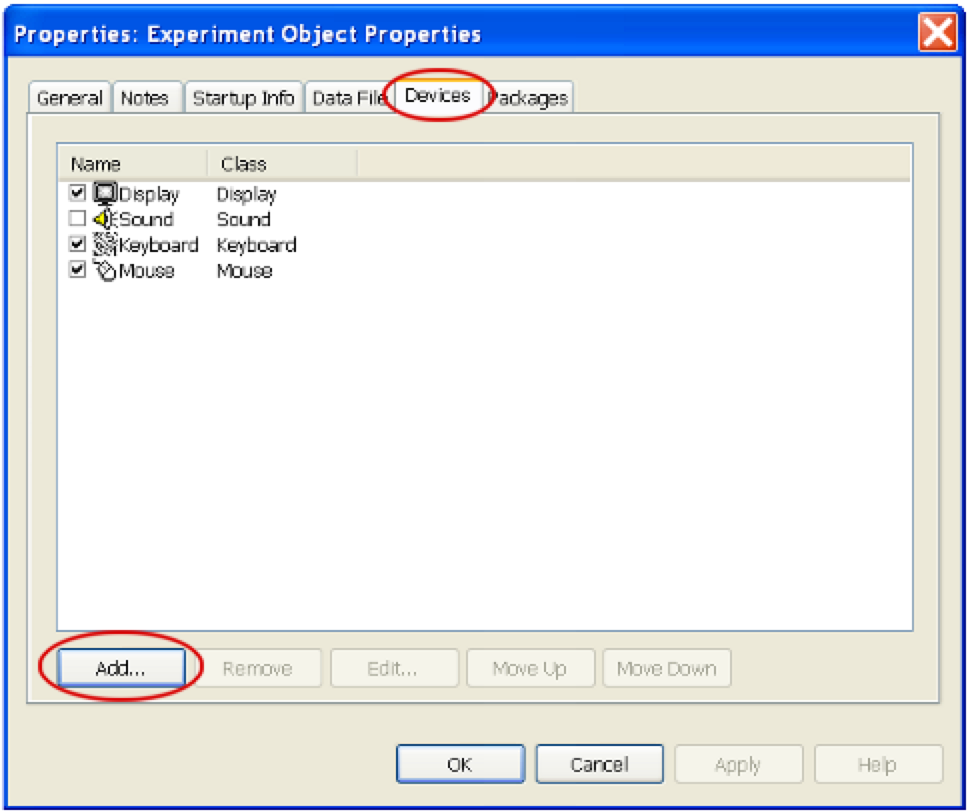
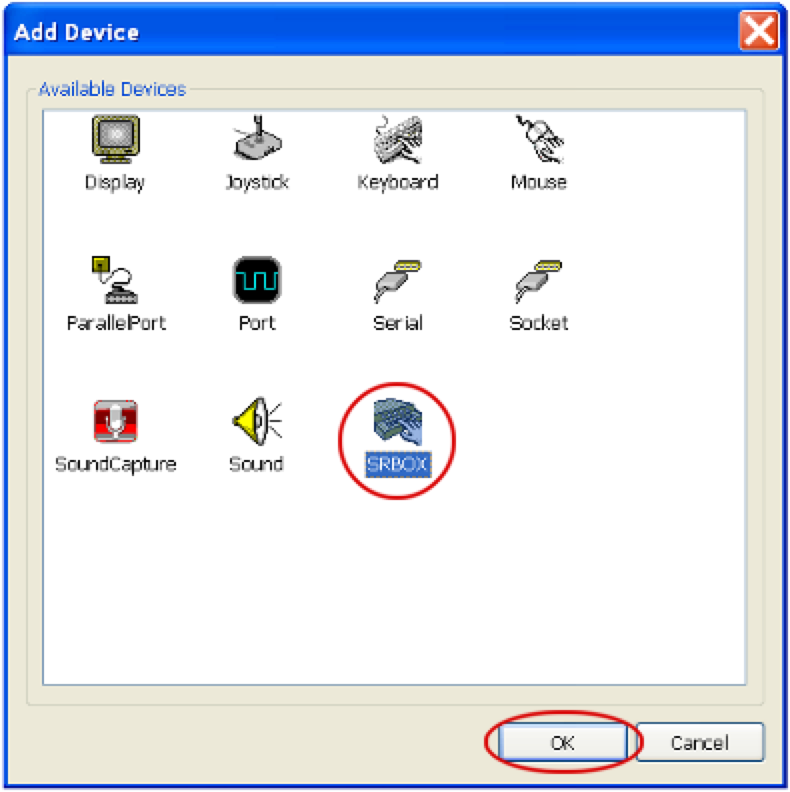
3.
The Add Device dialog will appear. Select the SRBOX icon then click on OK:
4.
Back in the Experiment Object’s Properties dialog, you will now see “SRBOX” listed. Double-click on it to edit its properties; the SRBox Edit dialog will appear.
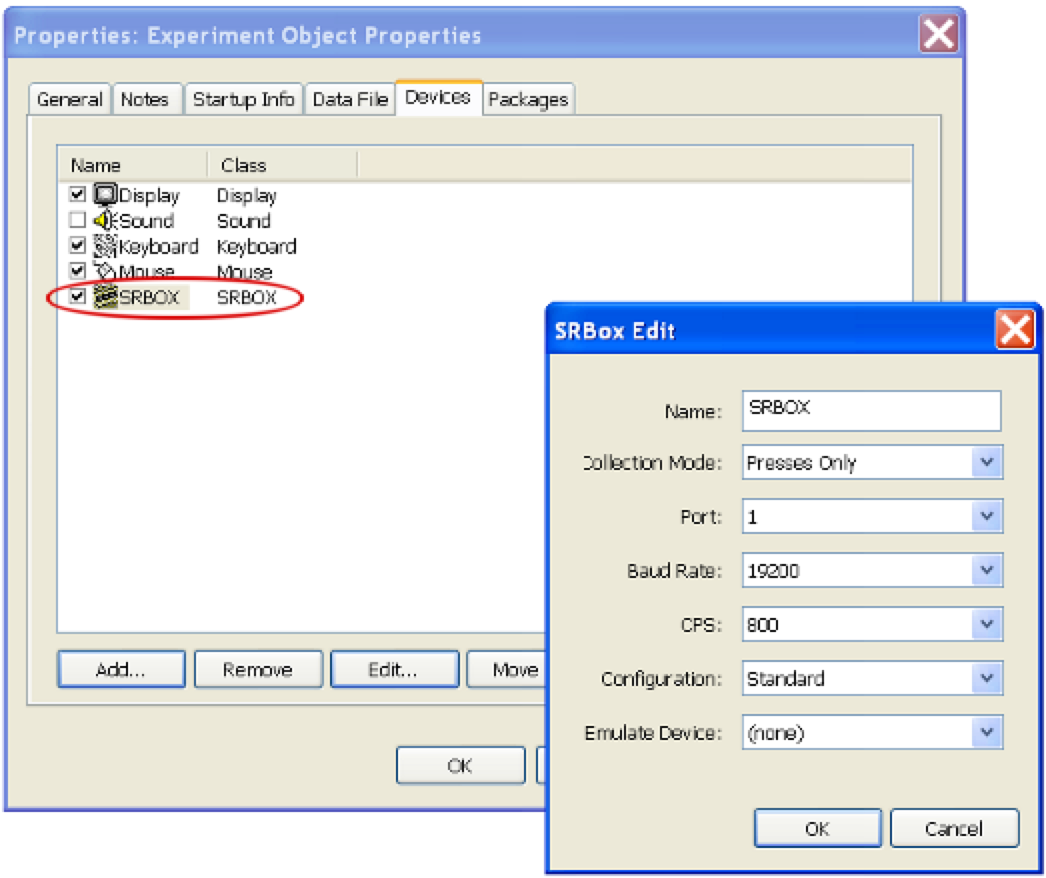
5.
In the SRBox Edit dialog, set the right configuration. The most important one (and the one that users often get wrong) is Port. A value of 1 refers to COM1, 2 refers to COM2, and so forth. This needs to be set to whatever COM port Windows thinks that SV-1 is connected to.
6.
Make sure that Baud Rate matches what your SV-1 is set to.
7.
Click on OK to close the SRBox Edit dialog.
8.
Click on OK to close the Experiment Object’s Properties dialog.
This completes setting up SV-1 for use with E-Prime.
Back in the main E-Prime window:
•

Double-click on StimSlide.
•
Double-click on the StimSlide properties icon. This will invoke the StimSlide Properties dialog.
•
In that dialog, click on the Duration/Input tab.
•
Click on the Add… button. The Add Input Device dialog will appear.
•
Select the SRBOX icon and click on OK.
Back in the StimSlide Properties dialog, you can set the input properties as needed by your experiment, e.g. Time Limit and End Action.
If you run into into issues, please see the “Known Issues and Troubleshooting” section on this tech support note for the RB-x30 response pads.
Last revision: February 16, 2011
PRODUCTS
SUPPORT
STAY IN TOUCH
© Copyright 2026 Cedrus Corporation, P.O. Box 6309, San Pedro, CA 90734 - USA
Phone: +1-310-548-9595. Send us an email
qwerasdf