Support ‣ XID ‣ Commands Reference ‣ m-pod Commands
Introduction
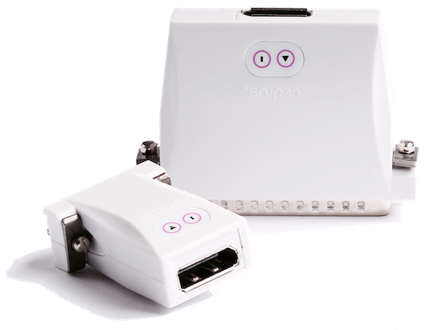
m-pod is different from the rest of the XID 2 class devices because it does not have a USB port. Instead, it connects to the back of Riponda, Lumina 3G controller, RB-x40, or StimTracker 2G — i.e. its host is another XID device. m–pod acts as a silent partner, receiving signals from the host and delivering them in a manner that suits the target, that being the EEG amplifier, eye tracker, or other recorder. The defaults used when m–pod ships will work in most situations, but there are options available.
(Note: on earlier Lumina 3G controller units, the “m-pod” connector was labeled “Accessory Connector II”.)
Communicating With m-pod
m-pod does not have a USB port. Communication takes place between the computer and m–pod’s host, i.e. a Riponda, RB-x40, Lumina 3G, or StimTracker 2G. A command, aq, is needed so that the host will stand aside and let the computer communicate directly with m-pod.
Important: m-pod can communicate only at 19200 baud rate. You will need to send an f1 (bytes 102 49 1) command to the host to set that speed before sending an aq command.
ae + action • Enable or Disable m-pod Output
This command is intended for in-house use. On StimTracker, this command affects all m-pod outputs. The action is:
1
0
Inquiry Command: send bytes ‘_ae’. Returns ‘_ae’ followed by ‘1’ or ‘0’.
Enables m-pod
Disables m-pod
aq + m-pod number + action • Connect to m-pod
The m-pod number can be ‘1’, ‘2’, or ‘3’ for StimTracker 2G, and is always ‘1’ for the others. The action is:
1
0
2
Connect computer to m-pod
Disconnect computer from m-pod
Connect computer to m-pod, and host XID device will stop monitoring further commands. This is used only when updating m-pod’s firmware. The host XID device must be manually restarted afterwards.
For example, send ‘aq11’ to be able to communicate with m-pod and ‘aq10’ to stop communicating with m-pod and resume communication with the host XID device.
Inquiry Command: send bytes ‘_aq’ + m-pod number. Returns ‘_aq’ followed by the m-pod number, followed by the specific m-pod model, e.g. ‘P’ for parallel port; see description of command _d3 for the list of models. It returns ‘–’ if nothing is connected. When the response pad or Lumina is connected directly to StimTracker, ‘_aq1’ will return ’S’.
Output Modes
m-pod can handle four output modes. The default is “reflective”, meaning that m–pod is always reflecting the input that it receives from its host XID device. For example, when a key is pressed, the response pad will tell m–pod to raise the necessary TTL line. m–pod will keep that TTL line raised until the key is released. If key remains pressed for one second, m–pod will in turn keep the TTL line raised for one second. This mode allows a researcher to obtain both the onset and offset.
But there are times when this behavior is not desired. For example, when a line is raised, a recording device may not be able to detect input on the other lines. m–pod provides support for two other modes, “single pulse” and “double pulse”. If “single pulse” mode is enabled and the pulse duration is set to 5ms, then when a key is pressed m–pod will raise the TTL line for 5ms only regardless of how long the key is held down. If “double pulse” mode is enabled, then m–pod will send a second 5ms pulse when the key is released.
Some recording devices require a minimum pulse duration before an event marker can be detected. m-pod provides a fourth mode called “minimum” to accommodate such recorders. When enabled and pulse duration is set to 5ms, m-pod’s behavior is the same as “reflective” mode except that the output will always have a minimum duration of 5ms.
am + mode • Set Output Mode
Sets the output mode:
0
1
2
3
Reflective
Single pulse
Double pulse
Minimum
Inquiry Command: send bytes ‘_am’. m–pod returns ‘_am’ followed by the current mode.
al + mode • Set Output Logic
Sets the output to positive or negative logic. With positive logic, the output is normally 0V and becomes 5V when a signal is emitted. With negative logic, it’s the reverse: output is normally 5V and goes to 0V when a signal is received.
Send ‘alp’ to set positive logic or ‘aln’ for negative logic.
Inquiry Command: send bytes ‘_al’. m–pod returns ‘_alp’ or ‘_aln’.
aw + duration • Set Pulse Duration
Sets the duration, in milliseconds, of the pulse that m–pod should use if the mode is set to “single pulse”, “double pulse”, or “minimum”. The minimum value is 1, maximum is 255, and default is 5. The ‘duration’ parameter is a single byte, unsigned integer, in binary format.
We recommend that the pulse duration be as short as your recording device can handle.
Inquiry Command: send bytes ‘_aw’. m–pod returns ‘_aw’ followed by the pulse duration.
System Integrity
Due to some field reports about m-pod loosing its settings, XID firmware version 2.2.2 implements three system integrity features.
- m-pod’s data is now mirrored.
- In addition to the two mirrored copies, a third backup copy is stored.
- By default, m-pod is now “locked”. An unlock (au) command must be sent before sending a command that affects flash memory.
m-pod can automatically restore lost data upon power cycling from one of the two mirrored copies, or if both are corrupt, then from the backup copy. But prior to doing so, m-pod will flash an error code, described in the m-pod Troubleshooting page.
Note: the same changes also apply to c-pod.
au + flag + CRC code • Unlock m-pod
This command must be sent before you send any one of these commands: ‘d3’, ‘f7’, ‘ml’, ‘f1’, ‘am’, ‘aw’, ‘ab’, ‘af’, and ‘al’.
Set ‘flag’ to ‘1’ to unlock m-pod, or ‘0’ to lock it. When unlocking, you must first use _au to obtain the CRC code. The CRC code is ignored when locking.
Inquiry Command: send bytes ‘_au’. m–pod returns ‘_au’ followed by the flag and a 4-byte CRC code.
ab + code • Backup Flash Data
Performs a backup of the data stored in flash memory. The device must be unlocked using ‘au’ command first. You must first send an ‘_ab’ command to obtain the code, then send the ‘ab’ command with that code within 3 seconds.
Inquiry Command: send bytes ‘_ab’. m–pod returns ‘_ab’ followed by a 4-byte code.
Remapping Input to Output
m-pod has built-in translation tables that provides it with the ability to remap any input signal to any output pin. It can also remap multiple input signals to the same output pin, in a “logical OR” fashion, e.g map light sensor 1, or audio left, or audio to pin 1.
Internally, m-pod maintains two translation tables. Table 0 is used with the Riponda, RB-x40, and Lumina fMRI response pads, and table 1 is used with StimTracker. Because StimTracker is different from a response device and offers different capabilities, keeping two tables provides the user with reasonable defaults right out of the box, i.e. without having to run Xidon and reconfigure m-pod. Table 0 is always the default when m-pod is connected. When StimTracker starts up and detects an m-pod, it sends to it an ‘as1’ command to have m-pod used table 1 instead.
Note: Even though this page describes commands that are specific to m-pod, the af and ac command will also work on c-pod.
af • Commit Translation Table to Flash
Saves the translation table, setup by the at commands, to non-volatile flash memory, as well as the settings of the ml, am, and aw commands.
_ac • Returns Translation Table CRC
Returns ‘_ac’ followed by the CRC of the current translation table, regardless of whether it’s been saved to flash or not. The CRC value is a 4-byte value.
Example use: this feature lets an application determine if the contents of the translation table have changed.
as + table number • Switch Translation Table
Changes the currently active table. ’table number’ is
0
1
for Lumina 3G, Riponda, or RB
for StimTracker 2G
This command is intended for internal use only.
Inquiry Command: send bytes ‘_as’. m-pod returns ‘_as’ followed by the table number.
at + output pin number + input signal • Map Signal
Maps an input signal to a specific output pin.
The output pin number is a hex value from ‘0’ to ‘F’.
The second parameter is the input signal(s) that needs to be mapped to the output. It is an ASCII hex representation of a 32-bit number. See the translation tables below for the meanings.
You can send command ‘atX’ to reset the m-pod line mappings to factory defaults in the selected translation table.
Inquiry Command: send bytes ‘_at’ following by the output pin number. m–pod returns ‘_at’ followed by the output pin number, followed by an ASCII hex representation of a 32-bit number. You can also send ‘_atX’ to have m-pod return a complete list, though the use of this variant is recommended only when using a terminal emulator.
Signal Translation Table for Lumina 3G, Riponda, and RB-x40 Response Pads
Signal Name
Prog. Name
Hex Value
Signal Name
Prog. Name
Hex Value
Response Pad A – Bit 0
PORTA_BIT0
0x00000001
Response Pad A – Bit 1
PORTA_BIT1
0x00000002
Response Pad A – Bit 2
PORTA_BIT2
0x00000004
Response Pad A – Bit 3
PORTA_BIT3
0x00000008
Response Pad A – Bit 4
PORTA_BIT4
0x00000010
Response Pad A – Bit 5
PORTA_BIT5
0x00000020
Response Pad A – Bit 6
PORTA_BIT6
0x00000040
Response Pad A – Bit 7
PORTA_BIT7
0x00000080
Response Pad B – Bit 0
PORTB_BIT0
0x00000100
Response Pad B – Bit 1
PORTB_BIT1
0x00000200
Response Pad B – Bit 2
PORTB_BIT2
0x00000400
Response Pad B – Bit 3
PORTB_BIT3
0x00000800
Response Pad B – Bit 4
PORTB_BIT4
0x00001000
Response Pad B – Bit 5
PORTB_BIT5
0x00002000
Response Pad B – Bit 6
PORTB_BIT6
0x00004000
Response Pad B – Bit 7
PORTB_BIT7
0x00008000
Reserved
—
0x00010000
Reserved
—
0x00020000
Voice key
VOICE_KEY
0x00040000
Light sensor
LIGHT_SENS
0x00080000
Scanner trigger
TRIGGER
0x00100000
Reserved
—
0x00200000
XID_IN
XID_IN
0x00400000
XID_OUT
XID_OUT
0x00800000
USB event code – Bit 0
PORTE_BIT0
0x01000000
USB event code – Bit 1
PORTE_BIT1
0x02000000
USB event code – Bit 2
PORTE_BIT2
0x04000000
USB event code – Bit 3
PORTE_BIT3
0x08000000
USB event code – Bit 4
PORTE_BIT4
0x10000000
USB event code – Bit 5
PORTE_BIT5
0x20000000
USB event code – Bit 6
PORTE_BIT6
0x40000000
USB event code – Bit 7
PORTE_BIT7
0x80000000
Notes:
▪ The “Prog. Name” column refers to how the name appears in the C++ and Python libraries’ header files.
▪ “Response Pad A” refers to the buttons on the Riponda and RB-x40 response pads.
▪ “Response Pad B” is specific to the Lumina 3G controller, which can handle two response pads with up to five buttons each.
▪ USB event codes refer to signals sent via software using the mh or mr commands.
▪ “XID_IN” turns on anytime a byte of data arrives at the XID device; similarly, “XID_OUT” turns on when a byte leaves the XID device. These signals are useful mainly for the XID device itself.
Examples:
▪ at400040000 will make pin 4 high when the Voice key is active.
▪ at6001CFF00 will make pin 6 high when anything on Port B, voice key, light sensor, or scanner trigger is active. The hex value 0x001CFF00 is the sum of these signals’ corresponding hex values in the table above.
When m-pod is connected to a Riponda, RB response pad, or Lumina controller, the factory default is the equivalent of sending the following commands:
On m-pod units with 16-bit outputs:
On m-pod units with 8-bit outputs:
at000000001
at100000002
at200000004
at300000008
at400000110
at500000220
at600000440
at700080880
at801000000
at902000000
atA04000000
atB08000000
atC10000000
atD20000000
atE40000000
atF80000000
at001000001
at102000002
at204000004
at308000008
at410000110
at520000220
at640000440
at780080880
at801000000
at902000000
atA04000000
atB08000000
atC10000000
atD20000000
atE40000000
atF80000000
Here are visual representations:


Riponda or RB-x40 connected to an 8-bit m-pod.
Lumina controller connected to an 8-bit m-pod.

Riponda or RB-x40 connected to a 16-bit m-pod.

Lumina controller connected to a 16-bit m-pod.
Signal Translation Table for StimTracker 2G
The description of m-pod’s input signals is different for StimTracker 2G, given that it’s quite different in nature:
Signal Name
Prog. Name
Hex Value
Signal Name
Prog. Name
Hex Value
USB event code – Bit 0
EVENT_CODE0
0x00000001
USB event code – Bit 1
EVENT_CODE1
0x00000002
USB event code – Bit 2
EVENT_CODE2
0x00000004
USB event code – Bit 3
EVENT_CODE3
0x00000008
USB event code – Bit 4
EVENT_CODE4
0x00000010
USB event code – Bit 5
EVENT_CODE5
0x00000020
USB event code – Bit 6
EVENT_CODE6
0x00000040
USB event code – Bit 7
EVENT_CODE7
0x00000080
USB event code – Bit 8
EVENT_CODE8
0x00000100
USB event code – Bit 9
EVENT_CODE9
0x00000200
USB event code – Bit 10
EVENT_CODEA
0x00000400
USB event code – Bit 11
EVENT_CODEB
0x00000800
USB event code – Bit 12
EVENT_CODEC
0x00001000
USB event code – Bit 13
EVENT_CODED
0x00002000
USB event code – Bit 14
EVENT_CODEE
0x00004000
USB event code – Bit 15
EVENT_CODEF
0x00008000
Light sensor 1
LIGHT_SENS_1
0x00010000
Light sensor 2
LIGHT_SENS_2
0x00020000
Light sensor 3
LIGHT_SENS_3
0x00040000
Light sensor 4
LIGHT_SENS_4
0x00080000
Voice key
VOICE_KEY
0x00100000
Reserved
—
0x00200000
Audio – left channel
L_SPEAKER
0x00400000
Audio – right channel
R_SPEAKER
0x00800000
Participant input – Bit 0
USER_XID0
0x01000000
Participant input – Bit 1
USER_XID1
0x02000000
Participant input – Bit 2
USER_XID2
0x04000000
Participant input – Bit 3
USER_XID3
0x08000000
Participant input – Bit 4
USER_XID4
0x10000000
Participant input – Bit 5
USER_XID5
0x20000000
Participant input – Bit 6
USER_XID6
0x40000000
Participant input – Bit 7
USER_XID7
0x80000000
Notes:
- USB event codes refer to signals sent via software using the mh or mr commands.
- “Participant input” refers to incoming input from a Riponda, Lumina 3G, or RB-x40 response pad. On the StimTracker Quad model, this can also be input from the external TTL connector. It’s either or.
When m-pod is connected to StimTracker, the factory default is the equivalent of sending the following commands:
On m-pod units with 16-bit outputs:
On m-pod units with 8-bit outputs:
at000080000
at100040000
at200020000
at300100000
at4FF000000
at500400000
at600800000
at700010000
at800000001
at900000002
atA00000004
atB00000008
atC00000010
atD00000020
atE00000040
atF00000080
at000080001
at100040002
at200020004
at300100008
at4FF000010
at500400020
at600800040
at700010080
at800000001
at900000002
atA00000004
atB00000008
atC00000010
atD00000020
atE00000040
atF00000080
Here are visual representations:
StimTracker connected to an 8-bit m-pod.
StimTracker connected to a 16-bit m-pod.
Other Commands
Other than the commands described on this page, m-pod will also respond to the inquiry commands _d0 to _d7, and the f3 command to reprogram flash.
Back to XID Commands Reference page ►
Last revision: April 2, 2022